
As a homeowner, I’ve learned that home improvement is more than just a hobby—it’s an essential part of maintaining and enhancing my living space. Over the years, I’ve discovered that transforming my home doesn’t always require a hefty budget or professional help. With the right knowledge and a bit of elbow grease, anyone can make significant improvements to their living environment.
In this comprehensive guide, I’ll share my experiences and insights on how to upgrade your home effectively and efficiently. From budget-friendly DIY projects to energy-efficient improvements, we’ll explore a wide range of home enhancement techniques that can help you create the home of your dreams without breaking the bank.
Whether you’re a new homeowner or have been living in your house for years, these essential tips will empower you to take control of your living space and make it truly your own. By implementing these home improvement strategies, you’ll not only increase your property value but also create a more comfortable and functional environment for you and your family.
So, let’s roll up our sleeves and dive into the world of home improvement. Together, we’ll explore how simple changes can make a big difference in your daily life and overall home satisfaction.
Budget-Friendly DIY Projects for Every Homeowner
When it comes to home improvement, many people assume that it’s an expensive endeavor. However, I’ve found that there are numerous budget-friendly DIY projects that can significantly enhance your living space without emptying your wallet. Let me share some of my favorite cost-effective upgrades that any homeowner can tackle:
Refresh Your Walls with Paint
One of the most impactful and affordable home improvements is a fresh coat of paint. I’ve transformed entire rooms by simply changing the wall color. Here’s why painting is such a great DIY project:
- Paint is relatively inexpensive compared to other home improvement materials.
- The process is straightforward and doesn’t require specialized skills.
- You can dramatically change the mood and atmosphere of a room in just a weekend.
When I painted my living room, I chose a warm neutral tone that made the space feel cozier and more inviting. The transformation was remarkable, and guests often comment on how welcoming the room feels now.
Update Cabinet Hardware
Another simple yet effective upgrade I’ve done is replacing old cabinet hardware. This project is perfect for:
- Kitchen cabinets that look dated
- Bathroom vanities in need of a refresh
- Built-in wardrobes that could use a modern touch
By swapping out old knobs and pulls for new ones, I gave my kitchen a fresh look without the expense of replacing the cabinets themselves. The process was as simple as unscrewing the old hardware and screwing in the new pieces—no special tools required!
Create a Feature Wall with Peel-and-Stick Wallpaper
For those who want to add some personality to their space without committing to permanent changes, peel-and-stick wallpaper is a fantastic option. I used this in my home office to create a striking backdrop for video calls. The benefits of this DIY project include:
- Easy application and removal
- A wide variety of patterns and designs to choose from
- The ability to transform a space in just a few hours
The temporary nature of peel-and-stick wallpaper makes it ideal for renters or those who like to change their decor frequently.
By tackling these budget-friendly DIY projects, I’ve been able to update my home without overspending. The key is to focus on small changes that make a big impact. Remember, home improvement doesn’t have to be expensive to be effective. With a little creativity and effort, you can achieve a significant transformation on a shoestring budget.
The Importance of Regular Home Maintenance
As a homeowner, I’ve learned that regular maintenance is crucial for preserving the value and functionality of my property. Preventative care not only helps avoid costly repairs down the line but also ensures that my home remains a safe and comfortable place to live. Let me share some insights on why home maintenance should be a top priority for every homeowner.
Protecting Your Investment
Your home is likely one of the biggest investments you’ll ever make. By performing regular maintenance tasks, you’re essentially protecting that investment. Here’s how:
- Regular inspections can catch small issues before they become major problems.
- Routine upkeep helps maintain or even increase your property value.
- Well-maintained homes are more attractive to potential buyers if you ever decide to sell.
I remember when I first noticed a small leak in my roof. Instead of ignoring it, I immediately called a roofing professional for an inspection. This prompt action saved me thousands of dollars in potential water damage repairs.
Enhancing Energy Efficiency
Home maintenance plays a significant role in your home’s energy efficiency. By keeping your systems in top shape, you can reduce your energy consumption and lower your utility bills. Some key areas to focus on include:
- HVAC system: Regular cleaning and filter changes improve performance and efficiency.
- Insulation: Checking and updating insulation helps maintain comfortable temperatures year-round.
- Windows and doors: Sealing gaps and cracks prevents drafts and reduces energy loss.
After I upgraded my attic insulation and sealed some air leaks around my windows, I noticed a significant drop in my heating bills during the winter months.
Ensuring Safety and Comfort
Perhaps the most important aspect of home maintenance is ensuring the safety and comfort of you and your family. Regular checks and repairs can prevent accidents and maintain a healthy living environment. Some critical safety-related maintenance tasks include:
- Smoke and carbon monoxide detector testing and battery replacement
- Electrical system inspections to prevent fire hazards
- Plumbing system checks to avoid leaks and water damage
I make it a point to test my smoke detectors monthly and replace the batteries twice a year. This simple habit gives me peace of mind knowing that my family will be alerted in case of an emergency.
By prioritizing regular home maintenance, I’ve been able to keep my home in excellent condition while avoiding unexpected repair costs. It’s not always the most exciting part of homeownership, but the benefits far outweigh the time and effort invested. Remember, a well-maintained home is a happy home, and taking care of your property today will pay dividends in the future.
Clever Storage Solutions to Maximize Space
As a homeowner, I’ve often found myself wishing for more storage space. Over the years, I’ve discovered that the key to a clutter-free home isn’t necessarily having more square footage, but rather maximizing the space you already have. Let me share some clever storage solutions that have helped me make the most of every nook and cranny in my home.

Utilize Vertical Space
One of the most overlooked areas for storage is the vertical space in our homes. By thinking upwards, you can create storage where you least expect it. Here are some ways I’ve made use of vertical space:
- Floor-to-ceiling bookshelves: These not only provide ample storage but also create a striking focal point in a room.
- Over-the-door organizers: Perfect for bathrooms, bedrooms, or pantries to store small items.
- Wall-mounted shelves: Great for displaying decorative items while freeing up floor space.
In my small home office, I installed a series of floating shelves above my desk. This allowed me to store books, files, and office supplies without taking up valuable desk space.
Multi-functional Furniture
Investing in multi-functional furniture has been a game-changer for me. These pieces serve double duty, providing both functionality and storage. Some of my favorite multi-functional pieces include:
- Ottoman with storage: Perfect for hiding away blankets and pillows in the living room.
- Bed with built-in drawers: Ideal for storing out-of-season clothing or extra bedding.
- Dining table with leaves: Expands for entertaining but can be compact for daily use.
My favorite multi-functional piece is a coffee table with a lift-top. It not only provides hidden storage but also creates a makeshift desk when I need to work from the couch.
Declutter and Organize
Sometimes, the best way to maximize space is simply to have less stuff. I regularly go through my belongings and follow these steps:
- Sort items into categories: keep, donate, sell, and discard.
- Invest in organizational tools like drawer dividers and clear storage boxes.
- Label everything to make items easy to find and put away.
After implementing a thorough organization system in my closet, I was amazed at how much more spacious it felt, even though I hadn’t physically expanded the space.
By implementing these clever storage solutions, I’ve been able to create a more organized and spacious-feeling home without actually increasing its size. Remember, the key to maximizing space is to be creative and think outside the box. Look at your home with fresh eyes, and you’ll likely discover untapped storage potential in places you never considered before.
Enhancing Curb Appeal: First Impressions Matter
As a homeowner, I’ve learned that curb appeal is not just about impressing the neighbors—it’s about creating a welcoming atmosphere that begins the moment someone lays eyes on your property.
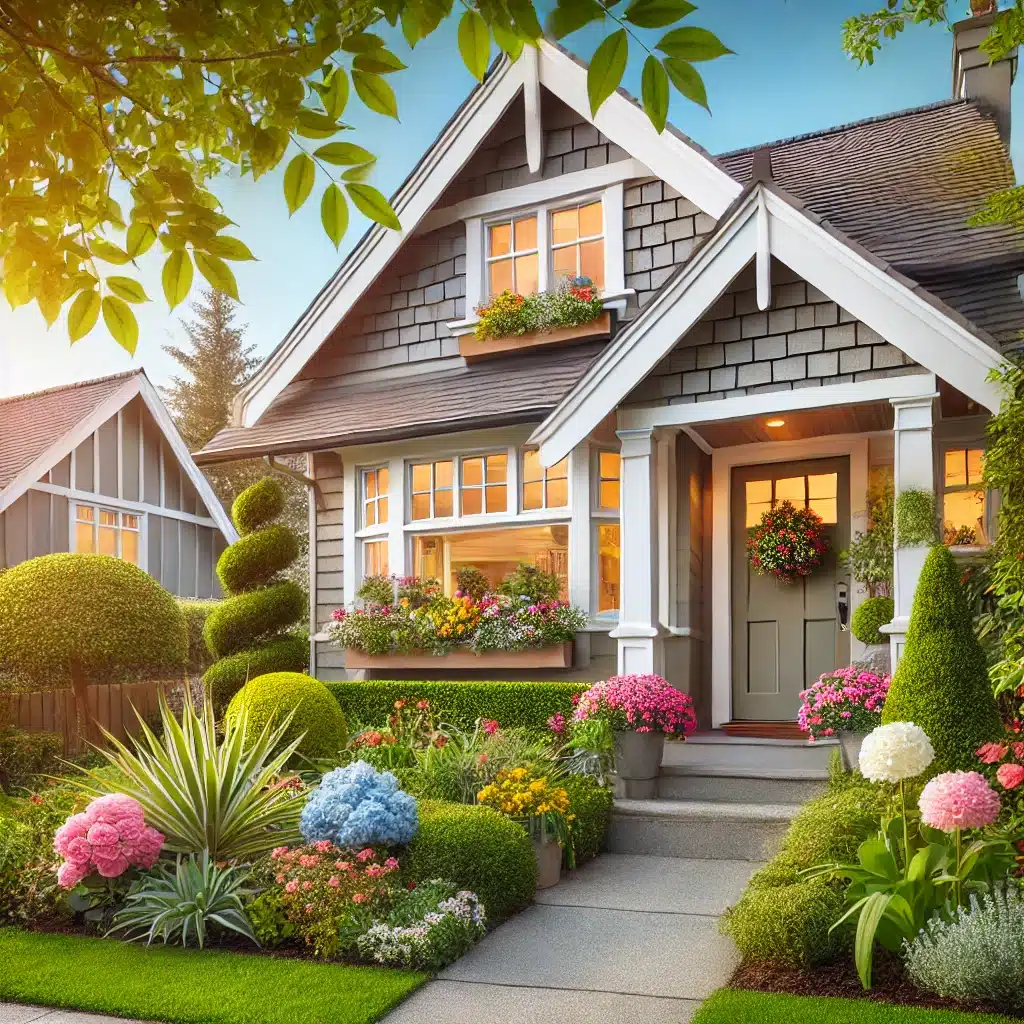
First impressions are crucial, and the exterior of your home sets the tone for what’s inside. Let me share some strategies I’ve used to enhance my home’s curb appeal and create a stunning first impression.
Landscaping for Impact
A well-maintained landscape can dramatically improve your home’s exterior appearance. Here are some landscaping tips that have worked wonders for my property:
- Plant colorful flowers: I’ve added vibrant annuals to my front yard to create eye-catching pops of color.
- Maintain a healthy lawn: Regular mowing, watering, and fertilizing keep my grass looking lush and green.
- Add landscape lighting: Strategic lighting highlights key features of my home and garden at night.
One of the most impactful changes I made was creating a winding stone pathway leading to my front door. It not only looks beautiful but also guides visitors through my carefully curated front yard.
Front Door Focal Point
Your front door is often the centerpiece of your home’s exterior. I’ve found that giving attention to this area can yield significant results:
- Paint the door: A fresh coat of paint in a bold, complementary color can make your entrance pop.
- Update hardware: New door handles, knockers, and house numbers add a touch of elegance.
- Add potted plants: Flanking the door with planters creates a welcoming entryway.
When I painted my front door a deep navy blue and added brass hardware, it completely transformed the look of my home’s exterior. The contrast against the light-colored siding made the entrance much more inviting.
Exterior Maintenance
Regular maintenance of your home’s exterior is crucial for maintaining and improving curb appeal. Some key areas I focus on include:
- Power washing: Regularly cleaning siding, driveways, and walkways keeps everything looking fresh.
- Exterior paint: Touching up or repainting when necessary prevents a worn-out appearance.
- Window cleaning: Sparkling windows make a huge difference in your home’s overall appearance.
Last spring, I spent a weekend power washing my driveway and walkways. The difference was astounding—it looked like I had installed new concrete!
By focusing on these aspects of curb appeal, I’ve not only increased the visual appeal of my home but also its value. Remember, the exterior of your home is like a book cover—it should entice people to want to see what’s inside. With some effort and creativity, you can create an exterior that you’re proud to come home to every day.
Energy-Efficient Upgrades That Save Money
As a homeowner, I’ve become increasingly aware of the importance of energy efficiency in my home. Not only does it reduce my carbon footprint, but it also leads to significant savings on utility bills. Over the years, I’ve implemented several energy-efficient upgrades that have made a noticeable difference in my home’s performance and my monthly expenses. Let me share some of the most impactful changes I’ve made.
Smart Thermostat Installation
One of the best investments I’ve made in terms of energy efficiency is installing a smart thermostat. Here’s why it’s been so effective:
- Programmable schedules: I can set different temperatures for different times of the day, ensuring I’m not heating or cooling an empty house.
- Remote control: I can adjust the temperature from my smartphone, which is perfect for unexpected schedule changes.
- Learning capabilities: My thermostat learns my preferences and adjusts automatically for optimal comfort and efficiency.
After installing a smart thermostat, I saw a 15% reduction in my heating and cooling costs within the first year.
LED Lighting Upgrade
Replacing all my old incandescent bulbs with LED lights has been another game-changer. The benefits of this upgrade include:
- Significant energy savings: LEDs use up to 75% less energy than incandescent bulbs.
- Longer lifespan: I don’t have to replace bulbs nearly as often, saving both money and time.
- Better light quality: LEDs provide brighter, more consistent lighting throughout my home.
I was initially hesitant about the upfront cost of LED bulbs, but the long-term savings have more than made up for it. Plus, many utility companies offer rebates for LED purchases, which helped offset the initial investment.
Improving Insulation
Proper insulation is crucial for maintaining a comfortable temperature in your home while reducing energy waste. I focused on improving insulation in these key areas:
- Attic: Adding an extra layer of insulation in my attic made a huge difference in both summer and winter.
- Walls: For older homes like mine, blow-in insulation can be added to existing walls without major renovation.
- Windows and doors: Weather-stripping and caulking around openings prevents drafts and air leaks.
After improving the insulation in my attic, I noticed an immediate difference in how well my home maintained a consistent temperature, and my energy bills dropped by about 20%.
By implementing these energy-efficient upgrades, I’ve not only reduced my monthly expenses but also increased the overall comfort of my home. The initial investment in these improvements has paid off many times over in energy savings. Remember, when it comes to energy efficiency, small changes can add up to big savings over time. Consider starting with one upgrade and gradually implementing others to see the cumulative effect on your energy consumption and utility bills.
Creating a Cozy Living Space with Minimal Effort
As a homeowner, I’ve discovered that creating a cozy living space doesn’t require a complete home makeover or a big budget. With some thoughtful touches and simple changes, you can transform your home into a warm and inviting retreat. Let me share some easy ways I’ve added comfort and coziness to my living spaces with minimal effort.
Soft Textures and Layering
One of the quickest ways to add coziness is through soft textures and layering. Here’s how I’ve incorporated this in my home:
- Throw pillows: I’ve added a variety of pillows in different textures and sizes to my sofa and chairs.
- Cozy blankets: Draping a soft throw over the arm of a chair or the end of the bed invites relaxation.
- Area rugs: A plush rug underfoot adds warmth and comfort, especially on hard floors.
In my living room, I combined a chunky knit throw with velvet pillows and a shag rug. The mix of textures instantly made the space feel more inviting and comfortable.
Warm Lighting
Lighting plays a crucial role in creating a cozy atmosphere. I’ve found that these lighting strategies make a big difference:
- Table lamps: Soft, warm light from table lamps creates a more intimate feel than harsh overhead lighting.
- Dimmer switches: Installing dimmers allows me to adjust the lighting to suit different moods and activities.
- Candles: Real or flameless candles add a warm glow and create a relaxing ambiance.
I installed a dimmer switch in my dining room, which allows me to create the perfect atmosphere for everything from casual family dinners to more formal entertaining.
Natural Elements
Bringing natural elements into your home can add warmth and a sense of calm. Some ways I’ve incorporated nature include:
- Houseplants: Adding greenery to rooms brings life and improves air quality.
- Wood accents: Wooden picture frames, side tables, or decorative objects add a natural, organic feel.
- Natural fibers: Incorporating materials like jute, cotton, or wool in rugs and textiles adds texture and warmth.
My favorite addition has been a large fiddle leaf fig tree in my living room corner. It not only looks beautiful but also makes the space feel more alive and connected to nature.

By focusing on these simple elements—soft textures, warm lighting, and natural accents—I’ve been able to create a cozy and inviting atmosphere in my home without major renovations or expense. Remember, coziness is often about the small details that appeal to the senses and make you feel relaxed and comfortable. Experiment with these ideas in your own space, and you’ll be amazed at how quickly you can transform the feel of your home.
The Ultimate Guide to Painting Your Home Like a Pro
As someone who’s tackled numerous painting projects in my home, I can attest that a fresh coat of paint is one of the most transformative and cost-effective home improvements you can make. However, achieving a professional-looking finish requires more than just slapping paint on the walls. Let me share my tried-and-true techniques for painting your home like a pro.
Preparation is Key
The secret to a flawless paint job lies in thorough preparation. Here’s my step-by-step process:
- Clean the walls: I always start by washing the walls with a mild detergent solution to remove dirt and grime.
- Repair imperfections: Fill any holes or cracks with spackling compound and sand smooth once dry.
- Tape off edges: Use painter’s tape to protect trim, windows, and any areas you don’t want painted.
- Prime: For best results, I apply a coat of primer, especially when making dramatic color changes or painting new drywall.
I once skipped the cleaning step in my haste to paint a room, and the result was a patchy, uneven finish that I had to redo. Lesson learned: never rush the prep work!
Choosing the Right Tools
Having the proper painting tools can make a world of difference. Here’s what I consider essential:
- Quality brushes: Invest in good-quality brushes for cutting in around edges and trim.
- Roller frames and covers: Use a 3/8-inch nap for smooth surfaces and a 1/2-inch nap for textured walls.
- Extension pole: This saves your back when painting ceilings or high walls.
- Paint tray: Look for one with ridges to help distribute paint evenly on the roller.
When I upgraded from cheap brushes to professional-grade ones, the improvement in my paint application was immediately noticeable. The paint went on smoother, and I had much cleaner lines around trim and corners.
Painting Technique
Developing a good painting technique takes practice, but here are some tips I’ve learned:
- Cut in first: Use a brush to paint around the edges of walls and trim before rolling.
- Use the “W” technique: When rolling, paint in a W shape, then fill in without lifting the roller.
- Maintain a wet edge: Always paint into the wet edge to avoid lap marks.
- Two coats: For best coverage and durability, I always apply two coats of paint.
One technique that dramatically improved my results was “boxing” the paint. This involves mixing all the paint for a room in one large container to ensure color consistency, especially when using more than one can.
Clean-Up and Touch-Ups
Proper clean-up and touch-ups are the final steps in achieving a professional look:
- Remove tape carefully: Pull the tape off at a 45-degree angle while the paint is still slightly wet.
- Clean brushes and rollers: Wash thoroughly with soap and water (for latex paint) or mineral spirits (for oil-based paint).
- Touch up: Once everything is dry, do a final inspection and touch up any missed spots or imperfections.
I keep a small amount of each paint color in labeled jars for future touch-ups. This has saved me countless times when dealing with scuffs or marks on the walls.
By following these steps and techniques, I’ve been able to achieve professional-looking results in my DIY painting projects. Remember, patience and attention to detail are your best tools when it comes to painting. Take your time, focus on each step, and you’ll be rewarded with a beautiful, long-lasting finish that transforms your living space.
Tools You Need for Every Home Improvement Project
As a dedicated DIY enthusiast, I’ve learned that having the right tools can make or break a home improvement project. Over the years, I’ve accumulated a collection of essential tools that I turn to time and time again. Let me share my list of must-have tools for every homeowner, along with some insights on when to consider tool hire for more specialized equipment.
Basic Hand Tools
Every homeowner should have a set of basic hand tools. These are versatile and essential for a wide range of projects:
- Hammer: Useful for everything from hanging pictures to minor demolition.
- Screwdriver set: Include both flathead and Phillips head in various sizes.
- Pliers: Needle-nose and adjustable pliers are incredibly versatile.
- Utility knife: Great for cutting materials and opening packages.
- Measuring tape: Essential for accurate measurements in any project.
I keep these tools in a easily accessible toolbox, so they’re always ready when I need them. Having these basics on hand has saved me countless trips to the hardware store for small repairs and projects.
Power Tools
While more of an investment, power tools can significantly speed up your work and improve results:
- Cordless drill: Perhaps the most useful power tool for any homeowner.
- Circular saw: Essential for cutting wood in various DIY projects.
- Sander: Makes wood finishing and paint prep much easier.
- Jigsaw: Great for making curved cuts in wood or other materials.
When I invested in a quality cordless drill, it revolutionized my DIY capabilities. It’s become my go-to tool for numerous projects, from assembling furniture to installing shelves.
Specialized Tools
For more specific tasks, you might need specialized tools:
- Level: Crucial for hanging shelves, pictures, and ensuring straight lines.
- Stud finder: Helps locate studs in walls for secure mounting.
- Pipe wrench: Essential for plumbing repairs and installations.
- Tile cutter: Necessary for any tile work in bathrooms or kitchens.
I found a stud finder to be invaluable when mounting heavy items like TVs or large mirrors. It provides peace of mind knowing that these items are securely attached to the wall.
When to Consider Tool Hire
While it’s great to own tools, some specialized or large equipment might be better suited for tool hire:
- Power washer: Great for cleaning exteriors, but not used frequently enough to justify purchasing.
- Floor sander: Essential for refinishing hardwood floors, but typically a one-time project.
- Concrete mixer: Useful for large concrete projects, but not needed often by most homeowners.
- Scaffolding: Necessary for exterior painting or repairs on multi-story homes.
I hired a floor sander when I decided to refinish my hardwood floors. It was more cost-effective than buying one, and I received guidance on proper use from the rental company.
Safety Equipment
Don’t forget about safety equipment when working on home improvement projects:
- Safety glasses: Protect your eyes from debris and splashes.
- Work gloves: Guard your hands against cuts, splinters, and blisters.
- Dust mask: Essential when working with materials that produce fine particles.
- Ear protection: Important when using loud power tools.
I always keep safety glasses and work gloves nearby when starting any project. Safety should never be an afterthought in DIY work.
By having these essential tools on hand and knowing when to consider tool hire for more specialized equipment from reputable companies like Mammoth Hire, I’ve been able to tackle a wide range of home improvement projects confidently and safely. Remember, investing in quality tools pays off in the long run, but don’t hesitate to rent equipment for one-time or infrequent tasks. With the right tools at your disposal, you’ll be well-equipped to handle whatever home improvement challenges come your way.
Safety Tips for DIY Enthusiasts
As a passionate DIY enthusiast, I’ve learned that safety should always be the top priority in any home improvement project. Over the years, I’ve developed a set of safety practices that have helped me avoid accidents and complete projects successfully. Let me share some essential safety tips that every DIY enthusiast should keep in mind.
Proper Personal Protective Equipment (PPE)
Wearing the right PPE is crucial for protecting yourself during DIY projects. Here’s what I always have on hand:
- Safety goggles: Protect your eyes from flying debris, dust, and chemicals.
- Work gloves: Guard your hands against cuts, splinters, and chemical exposure.
- Dust mask or respirator: Essential when working with materials that produce dust or fumes.
- Ear protection: Use when operating loud power tools to prevent hearing damage.
I once neglected to wear safety goggles while drilling into a wall, and a tiny piece of debris flew into my eye. It was a painful reminder of why eye protection is so important.
Know Your Tools
Understanding how to properly use your tools is key to safe DIY work:
- Read the manual: Always review the instructions before using a new tool.
- Inspect tools regularly: Check for any damage or wear before each use.
- Use tools for their intended purpose: Don’t improvise or misuse tools.
- Keep tools sharp and clean: Dull or dirty tools can be more dangerous than sharp, clean ones.
I make it a habit to familiarize myself with any new tool before starting a project. This has helped me work more efficiently and safely.
Electrical Safety
When working with electricity, extra caution is necessary:
- Turn off power: Always shut off the power at the circuit breaker before doing electrical work.
- Use a voltage tester: Confirm that wires are not live before touching them.
- Avoid water: Never mix electricity and water—ensure your work area is dry.
- Call a professional: If you’re unsure about an electrical task, it’s best to hire an electrician.
During a kitchen remodel, I hired an electrician for the complex wiring work. It was worth the cost for the peace of mind and safety assurance.
Ladder Safety
Many DIY projects involve working at heights, making ladder safety crucial:
- Inspect before use: Check for any damage or defects before climbing.
- Follow the 4-to-1 rule: For every 4 feet of height, place the base 1 foot away from the wall.
- Maintain three points of contact: Keep two hands and one foot, or two feet and one hand on the ladder at all times.
- Never overreach: If you can’t reach, climb down and move the ladder.
I once ignored the “never overreach” rule and nearly fell off a ladder while painting. It taught me to always take the time to reposition the ladder safely.
Chemical Safety
Many DIY projects involve working with potentially harmful chemicals:
- Read labels carefully: Follow all safety instructions and warnings.
- Work in well-ventilated areas: Open windows or use fans when working with strong-smelling products.
- Store properly: Keep chemicals in their original containers and out of reach of children and pets.
- Dispose of responsibly: Follow local guidelines for disposing of chemicals and their containers.
When refinishing furniture, I always work outdoors or in a well-ventilated garage to avoid breathing in harmful fumes.
Know Your Limits
Perhaps the most important safety tip is knowing when a project is beyond your skill level:
- Be honest about your abilities: Don’t take on projects you’re not prepared for.
- Research thoroughly: Understand what a project entails before starting.
- Ask for help: Don’t hesitate to call in a friend or professional for challenging tasks.
- Take breaks: Fatigue can lead to mistakes, so rest when needed.
I once attempted a plumbing repair that was beyond my expertise. After creating a small flood, I quickly learned the value of calling a professional for complex jobs.
By following these safety tips, I’ve been able to enjoy my DIY projects while minimizing risks. Remember, no project is worth compromising your safety. Take the time to prepare, use the right equipment, and know when to call in the experts. With these precautions in place, you can tackle your home improvement projects with confidence and peace of mind.
Conclusion: Make Your Home a Haven with These Easy Tips
As we wrap up this comprehensive guide to home improvement, I’m reminded of how transformative these simple changes can be. Throughout my journey as a homeowner, I’ve discovered that creating a comfortable, efficient, and beautiful living space doesn’t require a fortune or professional expertise. With the right knowledge, tools, and a bit of effort, anyone can turn their house into a true haven.
Let’s recap some of the key points we’ve covered:
- Budget-friendly DIY projects can make a significant impact on your home’s appearance and functionality.
- Regular maintenance is crucial for preserving your home’s value and preventing costly repairs.
- Clever storage solutions can maximize your living space and reduce clutter.
- Enhancing curb appeal not only improves your home’s appearance but can also increase its value.
- Energy-efficient upgrades can lead to substantial savings on utility bills while improving comfort.
- Creating a cozy atmosphere is about appealing to the senses with soft textures, warm lighting, and natural elements.
- Painting like a pro is achievable with proper preparation and technique.
- Having the right tools (and knowing when to hire specialized equipment) is essential for successful DIY projects.
- Safety should always be the top priority in any home improvement endeavor.
As you embark on your own home improvement journey, remember that the goal is not perfection, but creating a space that reflects your personality and meets your needs. Start small, tackle one project at a time, and don’t be afraid to learn as you go.
I encourage you to:
- Prioritize your home improvement projects based on your needs and budget.
- Research thoroughly before starting any project to ensure you have the necessary skills and resources.
- Invest in quality tools and materials—they often pay for themselves in durability and ease of use.
- Celebrate your successes, no matter how small. Each completed project is a step towards your ideal home.
Remember, home improvement is an ongoing process. Your needs and tastes may change over time, and that’s okay. The beauty of DIY is that you have the power to adapt your living space as your life evolves.
Finally, don’t forget to enjoy the process. There’s a unique satisfaction in stepping back and admiring a job well done—especially when that job has improved the place you call home. Whether it’s a freshly painted wall, a beautifully organized closet, or a more energy-efficient heating system, each improvement contributes to making your house a more comfortable and personalized haven.
So roll up your sleeves, grab your tools, and start transforming your living space. With these tips and your own creativity, you’re well on your way to creating the home of your dreams. Happy improving!

